Thursday, 16 February 2012

Hasegawa easy Eight (Part 2).

So, I finally got round to painting and putting the parts onto the Easy Eight. i would've opened the turret but I actually forgot you could do it. I'll have to save that for the crusader I've got here too.

So, got to try out my new airbrush from Christmas (it works great!). I did have to remove the road wheel and suspension piece, after I'd glued it on. Annoyingly I broke the pieces that locate it into the chassis, so I had to level them by eye. They still look good though so I can't complain.
I painted the road wheels with a fine brush around the edges that needed painting. I've yet to put any stowage onto the tank, there's a tarp rolled up that came with the kit but I'm also contemplating getting something off ebay or amazon to add more stowage, since they often had stuff on top of the tank. I also need to weather it, and the tracks need to go on. I'm not quite sure how I'm going to "heat weld" them together. But I suspect spoon handle on the hob will be a good plan.

Monday, 6 February 2012

Hasegawa M4A3E8 Sherman (Easy Eight)

I've finally gotten round to making a model here at uni, work's had me a bit snowed under til recently, but now I'm on top of things a little better I found time to put something together.

So over Christmas I got a few new models from my parents, a Churchill bridge laying tank, a DUKW and a Sherman "Easy Eight". I brought the DUKW, Sherman and a Crusader I bought on holiday in Wales a few months ago to uni, so i might get round to those at some point too.

Anyhow, on to the model.

The Tank
The kit is a Hasegawa M4(A3E8) Sherman, which was known as the "Easy Eight" (due to the e8 at the end of it's designation). The Easy Eight boasted a higher caliber gun than the regular M4A1 Sherman,  a different hull shape, engine and suspension as well.

The Kit
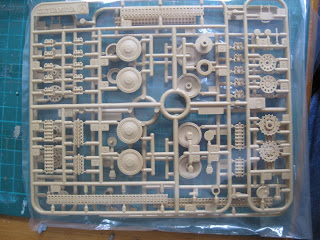
the kit is moulded in grey plastic and the tracks are vinyl (I think). Even though they're vinyl, the tracks seem to be higher quality than Airfix and Revell vinyl tracks.

I've had no major problems with assembly so far, everything has wanted to fit together with the slight exception of the turret halves, the two didn't quite fit together so I glued them in place then filled the gap with some plastic melted in liquid poly. Then once it had hardened, sanded the raised edges flat.

I took some pictures of my progress so far. I airbrused the olive drab onto the parts separately then glued them together to get a better finish on those nooks and crannies which can be difficult to reach with the airbrush once the whole thing is glued together.

Pictures of the current stages, sorry about the low quality I don't have access to my sister's SLR which I normally use to photograph. Instead I'm using the webcam attached to my netbook, which is much lower quality.


Tuesday, 27 September 2011

Airfix : White M3A1 Half-track. [Part 2]

Okay, this kit got much worse. Whilst I said last time, the chassis went together nicely, not so much for the body-work. it's been a right pain to put together.

I started, as the instructions said, by putting the walls of the thing together and attaching the back. Easier said than done I'm afraid. i thought about using blu-tack to hold the thing in place, I've noticed with a few previous models that blu-tack causes the glue to run and scar the model. I then thought about masking tape, but I didn't fancy cutting it to spec (mainly cause I'm lazy).

 
In the end Dad suggested using good old Lego. A favourable idea as I knew where the lego was, it was all sorted into boxes, but also since I needed the real panel to be 90 degrees to the back. Good old Lego.


This was the easiest part of the hull assembly, the cockpit. Mainly because it's only two pieces, it glues together nicely. Sadly the same isn't true about the rest of it. there's some odd shapes involved with the main hull which makes it harder than it should be to put together, but a lot of the pieces didn't seem to fit.


 The whole thing, once assembled, looks nice, it's not all been put together yet, there's still a few parts to glue on. But it's coming together nicely!

Sunday, 25 September 2011

Airfix : White M1A3 Half Track

Okay, so, first of all, I've not posted in ages, primarily this is because I've been busy or too lazy to work on the Marder.

I have however been working on small 1/72 stuff. Including a Jagdpanther and a SdKfz251/1. These are both built and painted now, and I'd forgotten about the blog. So I didn't think to document it. Still started a new one today when I remembered the blog. So I took pictures and such!


Onto the good stuff! The instructions are clear. Although I did stick the tracks on upside-down at first through lack of attention. I was disappointed by the amount of flash on some pieces. (Pictures to the left.) So I set about them with my craft knife, sandpaper and liquid poly tidying up edges and gluing parts together.


So far I've only put the undercarriage together. It was easy, apart from the exhaust, which requires a bit of a steady hand and a large amount  of liquid poly... But it does go together nicely, that aside.

I'll do some more work on it shortly, might put a post up tomorrow, or I might put one up tomorrow, depends how much I do.

Wednesday, 10 August 2011

The Marder III


So here's the first model to be put into blog form! I've made a few 1/72nd scale models over the last two or three weeks, and decided I'd gotten enough practice in to attempt something a little bigger. So I dug out the Tamiya Marder III my dad bought for me a while ago. 

Courtesy of the Bundesarchiv

I didn't know a whole lot about the Marder III before I'd opened the box, only little bits I'd picked up from games.  I thought it'd be a good idea to read up on it before I started, so I headed to good old Wikipedia, the starting point for all projects! In doing so I discovered a little about the background of the Marder III. I'll briefly outline below for anyone who's interested to read, but obviously more information available on Wikipedia.

The Marder III was a German Tank Destroyer put into service around 1942 and used on all fronts of the war. It was made using a Czech Panzer 38(t) chassis and mounting a Pak 40 75mm gun on top (or a 7,6cm Russian canon before the Pak 40 was widely available.)  Being a Tank Destroyer it was designed to engage tanks from long range and knock them out before being attacked itself, hence it was lightly armoured. But with a large armament to punch through enemy armour.

It was rushed into service as a stop-gap measure against Russian tanks of the time (The T-34) and continued to be used throughout the war.

Enough background I think on to the kit itself. It's seems to be well made, (a common trait of Tamiya I've read) with very little flash on the parts ( flash : excess plastic on the parts from the moulding process), and good detailing on the parts. Thanks to my dad, who has been making models far longer than I have, I decided to have a poke round on the web for people who've made the model before to see what they've done, and also to look for after-market parts which would be an improvement on the parts 'out of the box'. 

I didn't get much done on it today, as I was taking it slowly, and I'd been playing games all morning... But here's the parts still on the sprue.